How To
How To Trigger a SpecFlow Testery Run from TeamCity
Pre-requisites
In order to run Testery tests using the method described below, you will need to install Python and the AWS CLI on your TeamCity build agents.
- Install Python (tested on Python 3.7, other versions will likely still work) - https://wiki.python.org/moin/BeginnersGuide/Download
- Install AWS CLI - https://docs.amazonaws.cn/en_us/cli/latest/userguide/cli-chap-install.html
- Sign up for a Testery account if you don't already have one (https://testery.me/get-started)
Step 1. Add a testery.yml file to the root of your project
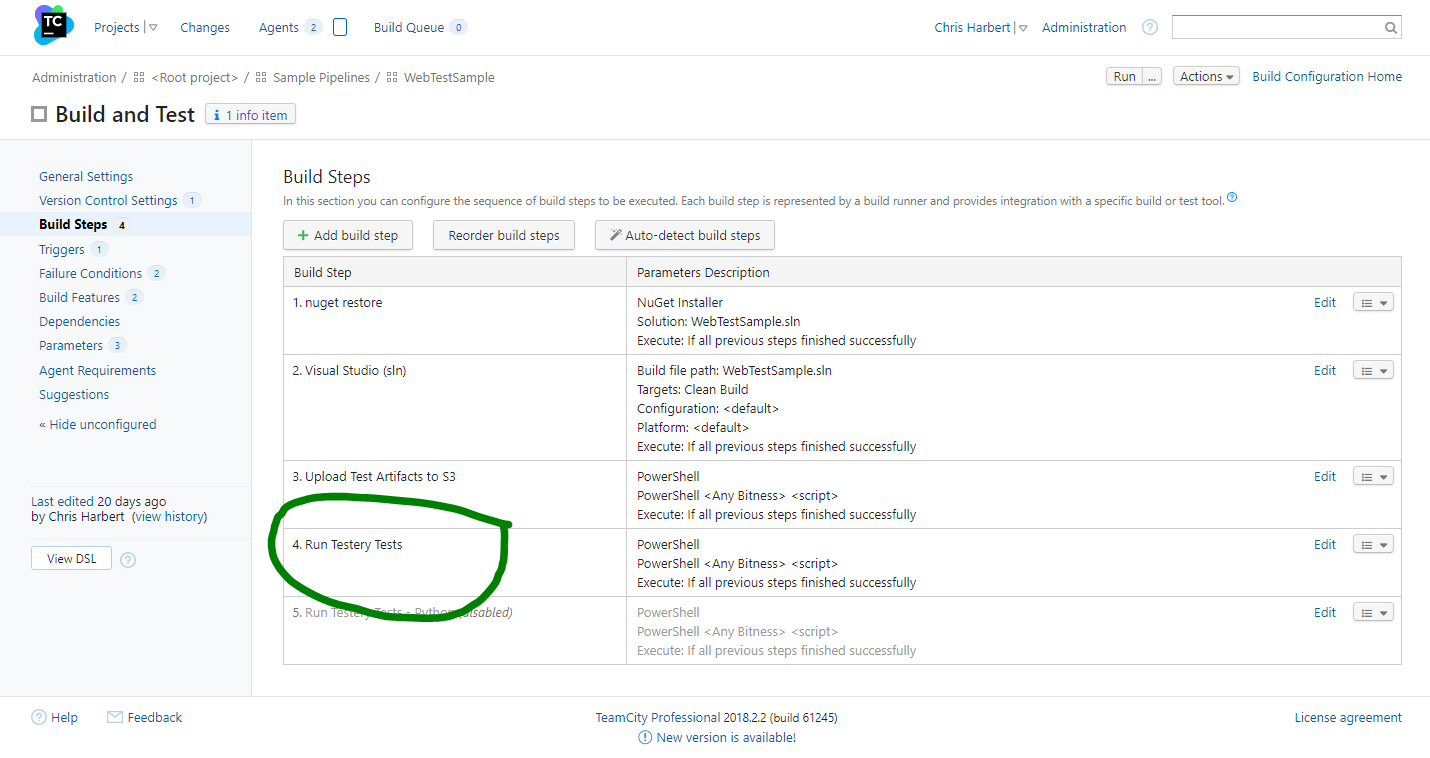
feature.path:<pathToFeatureFiles>Step 2. Add a build step to your build configuration to upload the test artifacts and kick off the test run.
- From the build configuration page, select Add Build Step.
- Set Runner Type to either Command Line or PowerShell.
- Set Step Name (e.g. "Run Testery Tests").
- Specify the following for Script source (updating with your own values).
pathToTestDllAssemblies is the build output directory of the project containing your SpecFlow feature files. It is normally set to<projectName>/bin/Debugdepending on how your Visual Studio project is configured.
# Upload the test artifacts.
aws s3 sync <pathToTestDllAssemblies> s3://s3.testery.io/accounts/<organization>/assemblies/<projectName>/%build.number%/

# Install the latest Testery CLI.
py -m pip install testery --upgrade

# Kick off the test run.
testery create-test-run --username <username> --token <token>
	--git-org <organization> --git-repo <repo> --git-ref "%build.vcs.number%"
    --build-id "%build.number%" --environment <environment>
    --project <projectName> --output teamcity
    --wait-for-results
    --fail-on-failure
    --runner "dotnet"